Three Ways to Open Up Your Kitchen to the Rest of Your Home
Widening an Existing Doorway: One of the simplest and least expensive ways to make a kitchen feel less isolated is to widen an existing doorway. Assuming there’s space on either side of the door, it’s a fairly simple matter to remove an existing door frame and widen it a few inches, or even a foot or two. Widening an existing door has the advantage of requiring little work. Often only an electrical switch or outlet must be moved to accommodate the widened space, saving both time and money. You’ll be amazed how much more open an old kitchen will feel by just widening a doorway, and it’s the type of project that has DIY written all over it!Creating a Pass-through Wall: A second path to a more open kitchen is to create a pass-through wall into an adjacent room. A pass-through is essentially an interior “window” that allows you to see through and interact with another space. Pass-throughs are popular for a couple of reasons. First, because a pass-through only impacts the upper half of a wall, base cabinetry, sinks and plumbing can often be left in place, reducing both remodeling time and expense. Second, even large pass-throughs located in load bearing walls are relatively simple to plan and install. This Old House has an excellent, short video on creating a pass-through wall and we’ve got several examples below of pass-throughs that we’ve created for clients.
Eliminating a Kitchen Wall: Of course, to create a truly open concept kitchen, you’ll want to remove a wall – or two – in your kitchen. For most, removing a wall requires professional help. First, you’ll want a skilled kitchen designer who will work with you to transform your wish list into a prioritized working plan. Your kitchen designer will likely also need the help of an engineer who can review and approve the mechanical restructuring of a load bearing wall, if one is targeted for removal.
Here are some variables you may want to consider as your plan on creating your open concept kitchen by removing an existing wall.
Things to Consider Before You Remove a Wall in Your Kitchen
Mechanicals in the Walls: All else being equal, the cost and complexity of removing a wall increases directly with the number of mechanical items that must be relocated. The first thing to consider is whether the mechanical items serve a floor above the existing kitchen. For example, if you’ve got a waste pipe that serves a bathroom above your kitchen, moving that pipe means that you’ll need to move the location of the upstairs bathroom. Similarly, if you’ve got an HVAC return air chase in the kitchen wall that serves a second floor, you’ll need to do some major home remodeling surgery on both floors.
A second thing to consider before you eliminate a wall full of mechanicals is whether your home has a basement, or crawl space. If your home sits on a concrete slab, it will be both difficult and costly to relocate mechanicals. With no sub-space in which to re-route mechanicals, moving a wall with HVAC and plumbing items often becomes economically untenable.
Assuming you have space to work below the kitchen, and that the mechanicals don’t feed a second floor, it’s time to estimate the cost to relocate these items.
The “Big 3” mechanical items typically found in a wall are HVAC, plumbing and electrical. While you might guess that plumbing is the most expensive to move, it’s actually the HVAC ductwork that normally tops the list. There are a couple of reasons for this. First, HVAC hardware, especially ductwork, tends to cost quite a bit more than plumbing and electrical items. Second, the physical size of ductwork often limits the choices for relocation and requires more framing, finish work and materials.
Moving plumbing can also be a challenge, especially sanitary lines and vent stacks. Waste water is typically gravity fed as it moves from your kitchen into your sewer line or septic tank. As a result, a downward pitch for the waste line must be maintained to drain sinks properly. The longer the run to the main waste line, the more vertical space in the wall or under the kitchen required for proper draining.
Most single family homes have vent stacks that run vertically from the interior of the home to just above the roofline. These pipes equalize the air pressure in the drain pipes, aiding the flow of waste water. If the wall you want to remove contains these vent lines, they must be relocated or replaced, when possible, by internal venting devices known as air admittance valves.
Finally, any electrical items in the targeted wall must be moved. It’s fairly easy and inexpensive to relocate switches and most wiring, but if the wall to be torn down includes a circuit breaker panel, expenses will mount.
The bottom line is that the more mechanicals there are in a wall to be removed, the greater the work and expense to remove the wall.
Load Bearing Wall: If you’re a fan of home improvement shows you know that there are two types of walls – load bearing and the non-load bearing curtain wall. A load bearing wall provides fundamental support for everything above it including floors, walls and roofs. Curtain walls do not support the home or structures above it and are largely decorative.
Needless to say, if you eliminate a load bearing wall, the weight it supported must be carried by some other structure. Columns that can be both structural and aesthetic can carry the load of the removed wall without the need to replace the header the wall supported. However columns can sometimes detract from the visual appeal of the space, especially when the homeowner wants a completely open visual plane.
The time and money required to eliminate a load bearing wall will vary based on the length of the wall to be removed, the weight the wall was supporting, and whether you want to hide the new load bearing header in the ceiling or allow it to be visible in the room.
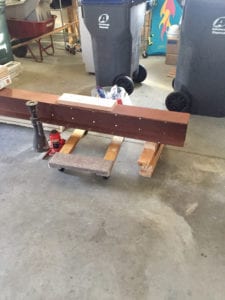
To bear the weight of a modestly-sized, load bearing wall, a wooden header is both an efficient and relatively inexpensive way to span the load between two knee walls. As the examples below suggest, wooden headers of ten to twenty inches in height are not uncommon.
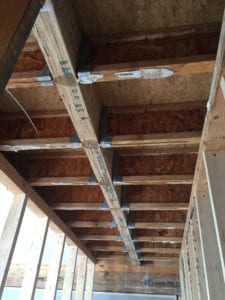
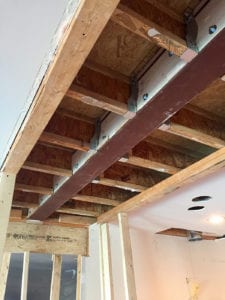
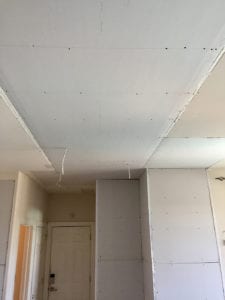
The least expensive way to install a wooden is to simply install it below the unmodified floor joists. This solution, while requiring not alteration to the joists, will create a visual break and reduce the ceiling height where the header sits below the joists. Some find the intrusion of the header distracting. If that’s the case, a steel beam, which can be comparatively thin in height, can be tucked in under the ceiling to hide the appearance of the header, creating a seamless ceiling.
Reduction in Storage and Work Space: It’s easy to forget that kitchen walls are where you typically locate cabinetry, and base cabinetry is the foundation for counter space. When you remove a wall you are also likely eliminating both storage and workspace. Be sure that before you decide to remove a kitchen wall that you’ve considered how to replace – or live without – these necessities.
Case Study: Combing a Kitchen and Dining Room Into a Single Space
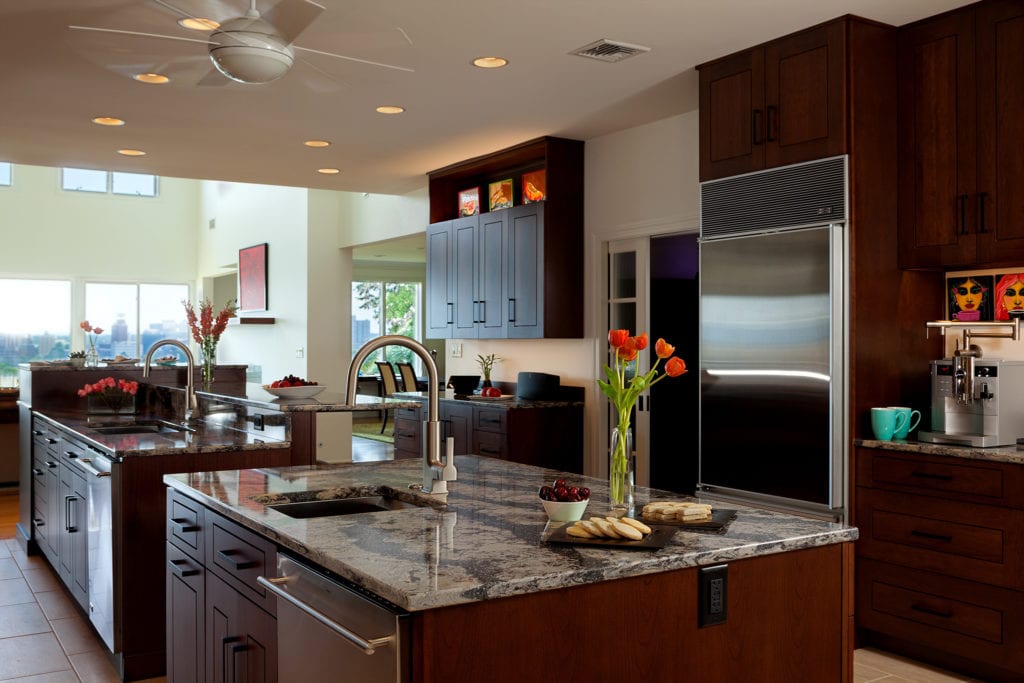
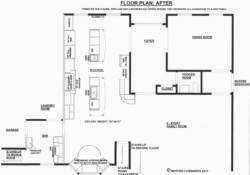
In a recent Mother Hubbard’s project in Harrisburg, the owners imagined a massive kitchen that would serve as the focal point for gathering family and friends. To satisfy this vision, the existing kitchen and dining room were combined into a single space with room for two kitchen islands, each including sinks and copious amounts of work space.
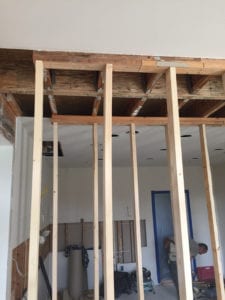
To create a single, seamless space a wall separating the spaces had to be removed. To carry the load of the removed wall and the second floor above, designer Stacey Kocevar worked with a structural engineer to create a steel I-beam that could be recessed into the ceiling.
A more difficult challenge was finding a way to move or remove the HVAC ducts that ran from the basement to the second floor in the wall to be removed. In order to keep the seamless transition across the combined rooms, moving the mechanicals to a different wall was not an option.
The creative solution was to install a second, standalone, HVAC system in the attic that served the second floor. Not only did this improve the consistency of heat delivered to the second floor during the winter, it also allowed energy to be saved by reducing energy use in the parts of the home not being used. The “Before” and “After” images below highlight the stunning transformation that resulted by removing the wall separating the two spaces.
Finding the Right Professional to Help Open Up Your Kitchen
In the end, if you’re planning on a major kitchen remodel, you’re likely going to want and need the help of a professional. Whether a kitchen designer, like Mother Hubbard’s, or a design-build specialist, having someone with both kitchen design and construction experience will maximize both the value and pleasure from your new kitchen.
Feel free to call Mother Hubbard’s for a free consultation on your kitchen remodeling plans.
- Charge Your Phone or Your Kitchen Dreams? The Freepower.io - June 21, 2025
- Why NKBA Design Certifications Matter Alot, Until They Don’t - September 3, 2024
- 2024 Kitchen & Bath Design Trend: Texture - April 9, 2024

